PC building is something all animators have to go through at one point to upscale their art. Most struggle with this as there’s an endless flurry of PC components to choose from with very little information on which is best for what purpose.
Plus, many animators find themselves lost in the world of technology jargon and end up wasting money on junk.
With the information detailed below, we’ll be showing you a simple step-by-step guide on how to build a PC for 3D rendering and animation, as well as walk you through what you will need, what components are best for your art style, and what to expect while building a PC.
By the end of our information, you will have all the knowledge you need to start building your own station, even if you’re a beginner animator or trying to upgrade your existing PC.
What to Know Before Building a PC?
The most common issue beginner animators struggle with is buying PC components without prior knowledge about components. Sure, some high-tech and new parts may look reliable to use, but they have a big chance of not living up to the way you want to present your art.
So, before you buy the very crucial parts for your PC, here’s what you need to ask yourself-
Which Rendering Software Are You Planning to Use?
Knowing before purchasing the software you’re planning to run with your new system is crucial. By having a set rendering engine, you can form a clearer idea of which components require more attention during the building process.
To put into perspective, if you’re using a rendering engine that relies on a CPU e.g., Corona Renderer, you will have to focus on the specifications of the CPU more than other components. Similarly, with GPU inclined rendering engines such as V-Ray GPU, you will need to look for powerful GPUs instead of CPUs.
Which Processing Unit Will You Be Using? CPU or GPU?
Right after software, the processing unit is your top priority. This will have a huge impact on the output quality of your rendering projects.
In the world of 3D rendering, the CPU is considered the industry standard. This is mainly due to the fact that it has an overall higher quality compared to most GPUs. We also highly recommend CPU as an ideal option if you want more precision in your work, as well as seamless quality every time you finish a project.
If you’re thinking about using a dated CPU, we advise against it as modern GPUs have made leaps and bounds in processing power and memory bandwidth and have outperformed older CPUs in general.
GPU rendering is, on average, 50-100 times quicker than CPU rendering, so if quick work is a necessity, you will need to consider this.
Even though rendering on GPU is much quicker than on CPU, there may be a downside when it comes to memory management, depending on your build. If your PC build has a lot of RAM and powerful CPUs, you should stick to rendering on the CPU instead to be on the safe side.
Where Should You Invest the Most While Building?
When considering this, you have to be a bit budget conscious. While both CPU and GPU have their ups and downs, you might need to compromise quality and settle if you want to get the cheaper option.
It’s not compulsory that both GPU and CPU should be above average, but if you work as a professional, we suggest going for the highest ranges. This is due to the fact that even when rendering on the CPU, a good graphics card is required to get your work done in acceptable condition quickly.
And if you’re rendering on GPU, you will still have to have a decent CPU as it affects particular tasks such as applying lens effects and de-noising.
PC Hardware Components for 3D Rendering and Animation
Now that you have a rough idea of what you’re expecting from your PC build, it’s time to start looking for the components that will be part of it. When customizing a build, finding the right hardware components is the most difficult step. However, this is the final step before putting the build together, which only takes a few minutes.
That being said, here are all the main components you need to build a PC for 3D rendering and animation –
CPU

As you might have already guessed, the CPU is the most important out of all the components of a PC. When searching for the right CPU, you need to consider two factors: the core count and clock speed.
Since your PC build needs to be suitable to render 3D animations, it’s best to go for a CPU with the highest possible core count. This is because while rendering, the engine assigns buckets to which each core is also assigned. After one is complete, the cycle continues, and a new one gets assigned.
Things get a bit different when modeling, though. As calculations are only performed on a single CPU core, several cores will unfortunately not speed up the viewport. That’s why we advise you to go for a CPU with a high clock speed as well.
The clock speed can also be referred to as ‘processor frequency,’ as you will see in the CPU specifications. The base frequency is the speed at which the CPU runs most of the time. When there is a heavier demand on the CPU, which is the case in 3D rendering, more power is required to meet this demand.
In the CPU specifications, you’ll also see the term “turbo boost.” This overclocks the CPU to meet the demand of the intense workload. Therefore, the CPU only goes to higher frequencies when it is crucial to do so. In turn, this increases the life expectancy of the CPU by preventing your PC from overheating.
That being said, we recommend a CPU with a high clock speed for active work such as texturing or modeling. But, for rendering, a CPU with a large number of cores is preferable.
GPU

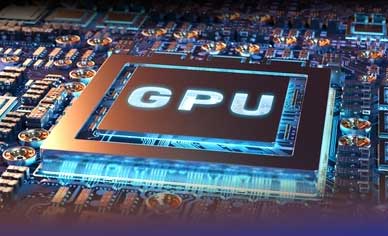
The GPU or Graphics Processing Unit is also a vital component in your PC build. For projects, it is responsible for the many shades as well as textures. While working, it assists with viewport performance, the usability of the engine, and real-time effects.
You have two major graphics card brands to choose from — NVIDIA and AMD. Both of these brands are reliable and have their own advantages, but every GPU is not compatible with every software.
So, you will have to go through the specifications of your desired software to ensure that the GPU you choose is going to accept it.
While rendering on GPU, you will need a lot of video memory or VRAM. This is an aspect of the GPU in which temporary data is stored. For instance, when loading data into a 3D scene and forwarding it to rendering, VRAM is vital.
That’s why you will have to consider a lot of VRAM in a GPU for the efficient completion of projects.
Coming to screen resolution, if you use full HD screens, 4 gigabytes of VRAM is a minimum for saving projects with minimal chances of error. This should be doubled to 8 gigabytes if you wish to use 4K resolution.
RAM

The RAM or Random Access Memory is responsible for storing all your working data. This is a factor that can often get overlooked but is very important when rendering. For a professional animator, around 32 gigabytes of RAM or higher is needed. But, it still may not suffice.
For simple animations, 32 gigabytes should be more than enough. But, for more complex scenes that come with higher polygon counts, countless minor details, and HD textures, you need to upgrade to 64GB, 128GB, or even higher.
On the other hand, if you’re still learning or just getting started with 3D Animation, 16GB of RAM is a good enough way to start.
Motherboard

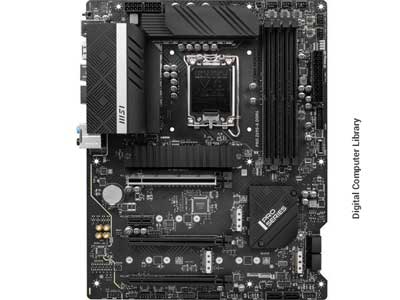
To bring all your PC’s hardware components together, a motherboard is vital. Since it doesn’t affect the quality of your projects, there’s not much to say for that aspect. Our only advice is to make sure the rest of your PC is fully compatible with the motherboard so that every hardware piece works at high efficiency.
The type of CPU socket, for example, has an impact on the overall connectivity of the CPU to the motherboard itself. Also, check to see if the motherboard you’re considering supports the amount of RAM you wish to get.
Finally, make sure the motherboard and the GPU are compatible.
Storage
While memory is responsible for the storing and retrieval of temporary data, storage is the opposite and is responsible for all the long-term data storage as well as retrieval. Here, size and speed are two factors to pay most attention to.
Storage is required for a number of crucial tasks, such as backing up data, installing software, building an asset library, saving projects and texture references, collecting briefs and feedback from clients, and so on. That is why the larger the size of your storage, the more you are able to store on your PC.
If you want external storage to keep all your work in or act as a server, 1 terabyte should be enough. Without external storage, you have no choice but to add to the existing storage.
Coming onto the next factor – speed. You are free to choose between a hard disk drive (HDD), or a solid state drive (SSD). Most animators prefer to use SSD as it is much faster and speeds up the entire image creation process.
So, if you want to swiftly load and save your scenes, textures, and files, as well as start your computer almost instantly, you’ll need a fast drive, such as an SSD.
Other Components
There are also a few other parts that go into PC building as well, including power supply (PSU), types of inputs, types of outputs, computer case, cooling systems, and communication devices.
However, the components we’ve gone through are the most important ones, which have a much greater impact on the quality of your rendering projects than these components.
With the knowledge of what to look for in the main components, you will find it easy to know how to choose these simple components as well.
How to Build a PC for 3D Rendering: Step by Step
Assuming that you now have all the right components to build your PC, it’s time for the actual assembly. This process is the easiest and takes less than an hour to complete depending on the build of your choice.
Here’s a simple step by step process on how to breeze through the assembly process:
Step One: Remove Case
Start with a clean slate by removing as much as you can of the PC case. This means taking apart all front and back panels and putting them aside for later.
To keep the loose screws from getting lost, keep them inside a small container for now.
Step Two: Install Cooling System
For this step, we’re going to give an example of the common fan cooling system. But if you’re using another kind of system, it’s best to look up the directions for the installation of the specific cooler.
In order for the PC to be able to maintain proper air circulation, position about 2 fans in the front and 1 fan in the back. This allows the 2 front fans to pull air inside while the back fan blows it out after cooling the system.
If possible, attach 2-3 fans on the chassis roof for more ventilation. This is highly recommended if you’re working on a low CPU or your PC usually heats up quickly.
Step Three: Install Motherboard
On the motherboard you’ve selected, you will see a thin metal plate covering. This is called the I/O shield, which goes on the back of the PC case to protect it as well as provide access for other I/O devices. This is shown by a number of cut outs on the metal for ports to pass through.
Ensuring the cut outs match the back of the motherboard, locate the rectangular opening on the chassis, and insert the shield. You will see small metal details resembling screws on the chassis, these are called standoffs, and the motherboard should be placed on top of them.
Now, after correctly positioning the motherboard on the standoffs, secure it with the proper screws.
Step Four: Install CPU
On your motherboard, you should be able to spot a small square-shaped socket. This is where the CPU is inserted. So, simply connect the CPU to the motherboard by socketing it.
However, this step can vary with differently branded CPUs, so we suggest going through the specifications of the label of your CPU and following the instructions provided by the manufacturer concerning the installation process.
Step Five: Install Memory
Next, you will need to locate the slot for the memory on your motherboard, which is close to the CPU and is held together by latches. These slots for the memory are called DDR4 slots, which need to be opened by pushing down the latches on both sides.
Once the latches are down, align the notch of the memory with the notch on the slot and insert it. Be careful during this, and gently push down on the memory to fit it into the slot. You will hear a “click” sound once it sets into place.
In case you’re using more than one memory stick, use the slots farthest away from the CPU or the second most close to it.
Step Six: Install Storage
Again, this step varies with the build you’re planning on. So, we’re going to assume it’s a simple SSD as an example for this step.
Usually, the SSD slot can be found below the slot for the CPU. However, if this isn’t the case for your PC, you can also use the 3.5 inch drive enclosures or more commonly known as “caddies.” These jackets are used for hard drives, so they should work just fine with SSD.
No matter the kind of storage drive you’re installing, make sure to align them correctly so that they face their designated cut out for wires to pass through to them easily.
Step Seven: Install Power Supply
Start by removing the screws for the back panel as well as the PSU bracket where the PSU is to be inserted and place them to the side. Before sliding the PSU in, connect all the necessary cables to it, such as SATA cable for the SSD and the PCIe cable for the graphics card.
Now, thread the cables through the back panel, then slide in the PSU through the bracket making sure it is faced the correct way. Once the PSU is in place, secure the bracket with screws.
Step Eight: Plugging in Cables
This can be a very tricky step to do without assistance, so go through the instructions on the motherboard installation manual carefully. There are countless cables that have to be plugged in, but make sure to connect each one carefully to avoid damaging them.
Since we can’t fit it all into one step, here’s a thorough and chaptered video to get you through this process quicker.
Step Nine: Input Graphics Card
The graphics card is inserted into a specific PCIe slot called a PCIe x16, which is the longest PCIe slot on the motherboard. If the slot has a small latch, flip it down so that the graphics card can be inserted.
Align the graphics card with its slot by facing its rear I/O shield to the chassis, and the gold colored details are facing the PCIe slot. Push down gently, and wait for the “click” sound to ensure it’s secured. Now you can screw it in place.
Step Ten: Finish
Before you screw the chassis panels back on, it’s highly recommended that you test to see if the build runs properly by turning the PC one.
This is simple. Just power up your PC and click into the BIOS screen. Here, you need to check vitalities such as CPU temperature. Ensure that it’s no more than around 40 degrees Celsius, as too hot temperatures may ruin the CPU or require thermal paste.
Once the CPU temperature is settled, check to see if the boot drive and RAM are running correctly. Just to make sure your RAM is operating at a suitable frequency, enable XMP for Intel or DOCP for AMD. Now, you can click out of BIOS and secure the panels of your chassis.
If you need visual assistance while setting up, check out this simple 5 minute video here.
Conclusion
That brings us to an end to all you need to know on how to build a PC for 3D rendering and animation as a learner. As complicated as PC building may be, we hope we were able to show you a simpler way of getting through this process with our information.
Remember to carefully go through the components while buying, as that will matter the most when it comes to the quality of your projects.

